

- Interaction details
- Evaluation outcomes
- Quality metrics
- Conversation Intelligence insights
- Metric-level evaluation results
- Optional fields
- Organization-specific custom fields
Supported Report Types
Scheduled Reporting supports the following report types:- Agent Performance Report
- Interaction Evaluation and Conversation Analytics Report
- Evaluation Form Summary Report
Reports Tab
The Reports tab displays all generated reports. Users can create new reports, view report details, download report files, edit configurations, manage schedules, and delete reports based on their permissions.Access Reports
Navigate to Quality AI > Analytics > Reports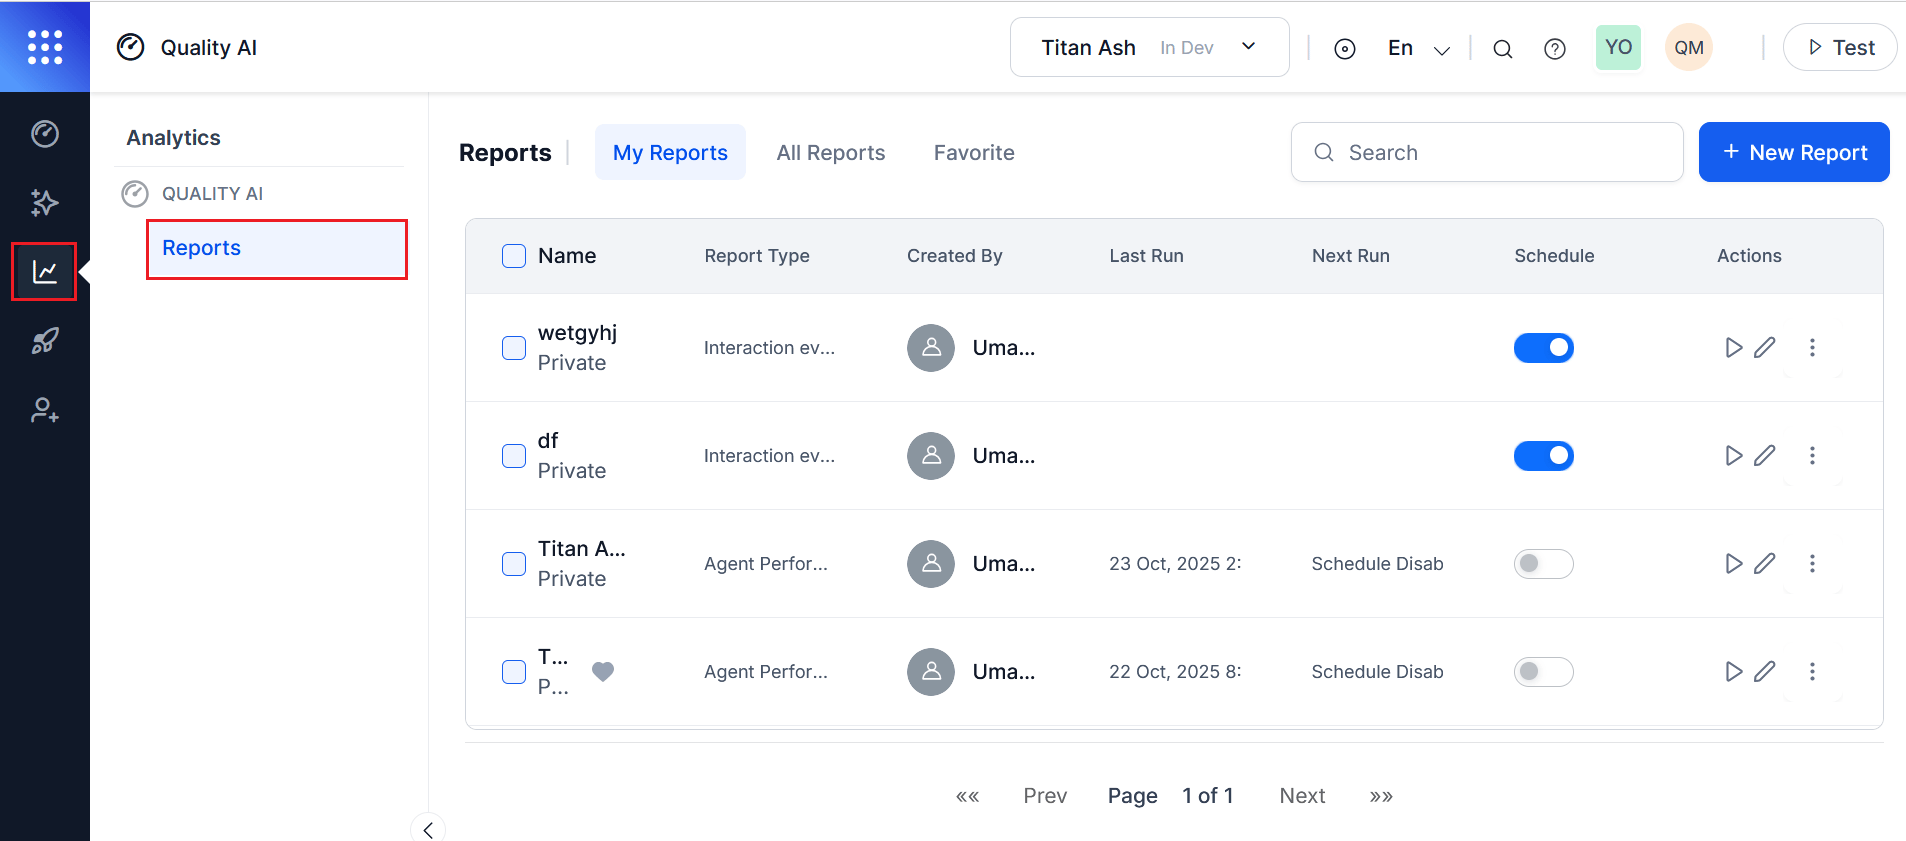
> The Quality AI Reporting permission is required to access reports. This permission is enabled by default for App Owners and Supervisors.
Reports Dashboard
The Reports dashboard displays all reports created by or shared with the current user.Dashboard Tabs
Reports Columns List
Search and Bulk Actions
Use the search bar to locate reports by name or report type. To perform bulk actions:- Select one or more reports.
- The bulk action menu appears.
- Select one of the following actions:
- Bulk Run: Runs the selected reports immediately.
- Delete: Deletes the selected reports.
- Confirm the action.
Deleting a report permanently removes the report and all associated data. You can’t undo this action, and the system requires confirmation before proceeding.
Report Configuration
With Quality AI, you can create, filter, and schedule reports for automated or on-demand delivery with customizable formats, bulk actions, and secure, role-based access.Create a Report
To create a new report, follow these steps:- Navigate to Quality AI > Analytics > Reports > + New Report.
- Select + New Report.
- Select a report type.
- Select Next to proceed.
You must select one report type before proceeding.
- General
- Configuration
- Schedule
General
The General step captures basic report information.
Select Next to continue.
Configuration
The Configuration step defines the report scope, filters, optional fields, and delivery settings. Available options depend on the selected report type. Data Source Depending on the report type, select one or more Evaluation Forms or Agent Scorecards. At least one evaluation form or scorecard is required. Reports include only data matching the selected configuration.
Report-specific filters are described in the corresponding report documentation.
Optional Fields Optional Fields add additional columns to the exported CSV report. Available fields depend on the report type, selected evaluation forms or scorecards, date range, and available metadata. Changing the date range may affect the available custom fields. Optional fields include standard system fields and custom organization-defined fields. Selected fields are appended as additional columns in the generated CSV export. Email Recipients Enter one or more email addresses in the Send Email to field. At least one recipient with the required permissions is required for scheduled delivery.
Schedule
You can generate reports immediately or on a recurring schedule. Choose one of the following execution methods.- Run on Demand (manual): Generates the report immediately using the current configuration. When Run on Demand is selected: Instant Run is enabled and Scheduling is disabled.
- Schedule (automated): Generates reports automatically according to the configured schedule.
Additional Schedule Settings
Configure the following settings:
Select Save to create or update the report. The generated report appears in My Reports.
Manage Reports
Edit Reports
To edit a report,- Select Edit from the Actions column.
- Modify the required fields.
- Select Save to activate the changes or reschedule the configuration.
View and Download Report History
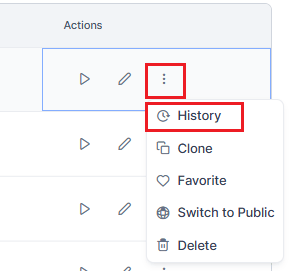
- From the Actions column, select the three-dot (⋮) menu.
-
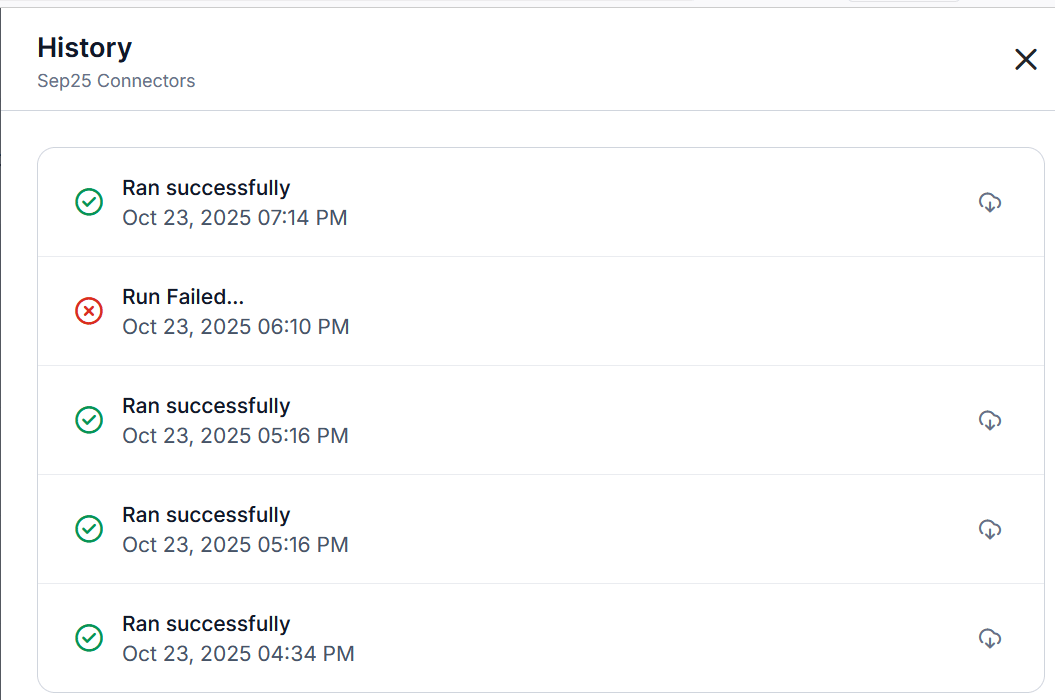
Select History to view the last five report runs.
-
Select Download to save a report run as a CSV file.
-
The generated reports show their status: run success (green) or run failed (red).
Reports are downloaded as CSV files. Exported columns vary depending on the selected report type, evaluation form, optional fields, custom fields, processing status, and report configuration.
Reports are available for download in CSV format only, with headers translated to the selected language.
Clone a Report
- Select the three-dot (⋮) menu.
- Select Clone to create a copy of the report configuration.
Favorite or Unfavorite a Report
- Select the three-dot (⋮) menu.
- Select Favorite or Unfavorite.
- All tagged favorite reports appear in the Favorites tab.
Change Report Visibility
Reports are Public by default.- Select the three-dot (⋮) menu.
- Select Switch to Public or Switch to Private.
Private reports are accessible only to the report creator or users/groups explicitly granted access.
Delete Report
Deleting a report permanently removes its configuration, associated schedule, and all history.- Select the three-dot (⋮) menu.
- Select Delete to remove the report.
- Select Confirm.
Report Output Format
Reports are exported as CSV files.-
File Name:
[ReportName]-YYYY-MM-DD-HH-MM-SS.csv -
Headers: Headers are translated based on the selected report language.

Email Delivery
The system delivers all scheduled reports by email in the following standard format.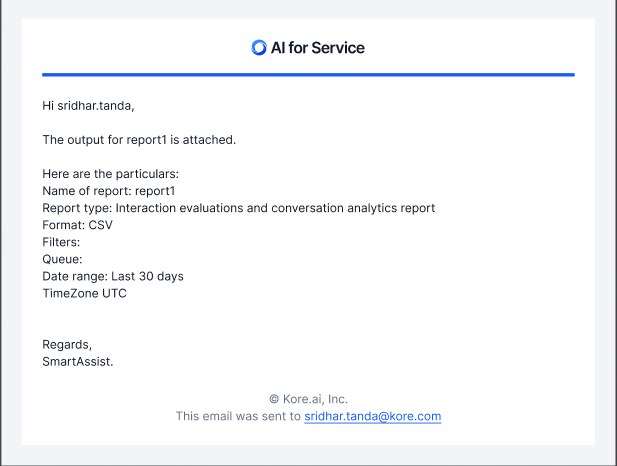
Report Behavior
Reports calculate metrics using evaluated interactions only.Data Availability Behavior
- Partial Data: Reports include all available conversation metadata. Pending and Validation Failed conversations contain only the metadata available when the report is generated because evaluation processing hasn’t completed.
- No Matching Data: An empty CSV with header rows is generated, and the email indicates that no data matches the criteria with suggestions for alternative filter configurations.
Access Control
The following table describes report-related permissions based on user roles.Users without the Quality AI Reporting permission can’t access the Reports section, view any reports, create reports, receive scheduled report emails, or download historical reports.